Capture and rescue of injured, sick or orphaned wildlife
Rescuers have a responsibility to ensure handling and capture methods are humane and do not put themselves or others at risk. Capture is stressful for wildlife, and so must be carefully planned and undertaken quickly to avoid further stress or injury.
It is important to always put the safety of rescuers and members of the public first. Always assess possible hazards with each rescue (e.g. dangerous terrain, near a busy road, risk of injury from the animal such as bites or scratches) and put in place measures to minimise these risks (e.g. appropriate protective equipment).
Carefully plan the method of capture
Time spent observing the animal, the escape route it wants to follow, and coordinating your movements is invaluable. Always assess the animal from a distance first, observing using binoculars if possible. This improves your own safety and minimises the possibility of an animal trying to flee and hurt itself further, or escaping. It will also help you confirm whether the animal requires rescuing (i.e. some minor injuries do not need treatment and will heal on their own).
Minimise the time taken to capture the animal
Ideally less than three minutes, to avoid muscle damage.
The following should be considered:
- When the weather is warm, capture should be attempted early morning or late afternoon and should not be conducted during the heat of the day.
- Animals must never be chased over long distances or for long periods of time. For some animals, this can prove fatal.
- If you cannot capture the animal after the first couple of attempts, withdraw and consider using another method of capture.
- Wildlife should be handled calmly, without sudden movements and using the least number of people possible.
- Be firm but gentle when handling the animal and handle it as little as possible. Remember, it is a wild animal and is not used to humans.
- When restraining an animal by hand, use gloves that protect your hands but don’t limit your dexterity.
- Always ensure that the animal can breathe and regulate its own temperature when restraining or transporting wildlife.
- Darkened cages and/or blindfolds (e.g. a blanket placed on the animal’s head) should be used whenever possible to reduce stress and subdue animals.
- Excessive noise from loud equipment, vehicles or talking should be minimised during rescue and transport.
Please note
Some veterinary drugs, including drugs for sedation, are restricted under the Drugs, Poisons and Controlled Substances Regulations 2017. Restricted drugs must only be administered to wildlife by, or under the direct supervision of, a registered veterinary practitioner. Direct supervision means that the veterinary practitioner has seen and assessed the animal and prescribed the medication based on the species, weight and type of illness or injury. Administering restricted veterinary drugs to wildlife without veterinary diagnosis and prescription is illegal.
Check for young
Always check female animals to see if they are lactating or carrying pouch young. If they have a long teat, check the nearby area for young at foot. Taking a mother into care could result in the death of her young who will be left behind to fend for itself.
Record the location
It is important to ensure you record the exact location of where the animal was found and make sure this information remains with the animal until it is ready for release. This will enable the animal to be returned to where it was found and provide it with the greatest chance of survival.
Basic first aid
The aim of first aid is to provide basic and immediate assistance to an injured animal, prior to it receiving veterinary attention. The goal is to address shock and prevent further damage occurring due to broken bones or bleeding wounds. First aid should be administered as soon as possible after capture.
First aid should be provided in the following order:
- Perform an initial brief examination
- Obtain and record the weight of the animal
- Assess the degree of dehydration
- Provide a warm and dark quiet place to treat shock
- Provide fluids
- Apply bandaging
After giving first aid, rescuers should arrange for animals to be assessed by a registered veterinarian or person experienced in diagnosing illness, diseases and injuries in the species as soon as possible to ensure accurate diagnosis and prompt treatment. If this is not possible (e.g. because of the remoteness of the location), expert advice must be sought via telephone or email.
Initial examination
The first step is to examine the animal quickly (but gently) to determine whether its injuries or illness warrant euthanasia, or otherwise determine what treatment may be required, or where a more detailed veterinary assessment is needed (e.g. to check for fractures).
If possible, stand back and quietly observe the animal for a minute. This is a good, low stress way of checking for injuries.
If the animal is experiencing significant pain, distress, trauma or disease that cannot be relieved or if there are severe injuries such as exposed bones or intestines, the animal must be promptly euthanised in accordance with Conditions 10 and 11 of your authorisation.
If the animal would not survive without extensive treatment or surgery, and/or is unlikely to recover sufficiently to be self-sufficient in the wild at the location where it was found, it must also be promptly euthanised.
Obtain and record the weight of the animal
The weight of the animal should be obtained to determine:
- If the animal is the correct weight for its age and species
- What amount of fluids are needed to correct dehydration (see below)
- What amount of medication may be required
- What amount of food is required each day
Assess the degree of dehydration
At the time of initial examination, it is important to know the severity of dehydration to identify those animals that may not survive and to provide the correct amount of fluid. Dehydration can be assessed by the degree of skin “tenting”. This is assessed by gently pinching a small amount of the animal’s skin and estimating how long the skin takes to return to its normal position. The longer this takes, the more dehydrated the animal is.
Various animal species have different places to look for evidence of dehydration. Table 10 outlines locations where skin tenting can be carried out to assess dehydration.
Your initial assessment should help you to decide whether the animal requires veterinary attention or if you have the skills and ability to support it. If veterinary assistance is required, try to get it to a veterinarian within 24 hours of rescue to provide the best chance of survival.
Table 9 Determine the severity of dehydration
| Dehydration percentage | Appearance | Treatment | Prognosis for survival |
| 5% | Animal lively and active. Gums are tacky. Skin tenting takes less than 1 second to fall. | Oral electrolyte solutions. | Good |
| 10% | Lethargic, tacky gums. Skin tenting takes more than 1 – 2 seconds to fall. | May require subcutaneous fluids as well as oral electrolytes. | Moderate |
| 12% | Skin tenting takes more than 2 seconds to fall. Lethargic, loss of consciousness, low body temperature, slow heart rate. | Requires intravenous fluids administered by a veterinarian. | Poor |
Table 10 Locations where skin tenting can be carried out
| Animal group | Site to pinch skin to assess dehydration |
| Birds | Foot and over keel bone |
| Possum, macropod, flying fox | Over shoulder blades |
| Wombat, Echidna | Over abdomen |
| Koala | Over head |
| Snakes, Water dragons | Along body wall |
| Turtles | On neck |
Provide a warm, dark and quiet place to treat shock
Animals can enter a state of shock following injury or disease. These animals will have cool ears and feet and will not defecate or urinate as the body tries to conserve water.
Animals in shock must be provided with a quiet and dark location following the initial examination, weighing and dehydration assessment. An easy way to provide this is to cover enclosures with a towel. For marsupials, placing them into a pouch will provide a dark location.
You should also make sure the room or enclosure is warmed to a temperature appropriate for the species, although it is preferable to have a heating gradient across the enclosure to allow the animal to move away from the heat if they wish.
While an animal is in a heated enclosure, the temperature of the enclosure should be monitored with a thermometer. The behaviour of the animal should also be monitored to ensure it is comfortable. This is particularly important for animals that are unable to move to ensure the animal does not become too hot or too cold.
Provide fluids
Dehydration will occur with orphaning, injury or shock. For normal digestion and healing to occur, dehydration must be corrected. All animals must be warmed before fluids are given. The fluid itself should also be warmed to the animal’s normal body temperature before being given. Suitable temperatures of fluids are:
| Reptiles | 22 – 28°C |
| Birds | 36 – 38°C |
| Marsupials | 32 – 36°C |
The standard approach is to assume that each animal that comes into care is 10% dehydrated. If it is less than 10% dehydrated and you give fluids, the animal will simply urinate more. If the animal is greater than 10% dehydrated you could prevent it from going into shock.
To calculate the amount of fluid to give an animal every 24 hours, use the following formula:
Fluid volume to give (in millilitres) = body weight (in grams) x 0.1
For example, a 100g Ringtail possum that has entered care due to orphaning will need to be hydrated. How much fluid should be given?
| Body weight (g) x 0.1 | Fluid volume to give (ml) |
| 100g x 0.1 | 10ml |
Therefore 10ml is the total volume that the Ringtail possum needs in a 24-hour period. This should be broken up into smaller amounts that the possum can accept and be offered throughout the day.
For example, this might be given as 2 – 3ml every 6 hours over a 24-hour period.
Fluids can be given either:
1 By mouth
This route is used for conscious animals that can swallow and move. This is the ideal route and should be used wherever possible. Offer a small amount of water to the side of the mouth and wait for swallowing. Oral rehydration solutions that can be used include:
- Cooled boiled water.
- Oral rehydration fluids, e.g. Vytrate®, Lectade® (Jurox), Gastrolyte®, Spark® (Vetafarm).
- Home-made rehydration fluids, i.e. 1 teaspoon of salt and 1 teaspoon of sugar are dissolved in 1 metric cup of cooled boiled water.
2 Subcutaneous injection
This route is used for depressed animals with poor swallowing reflexes. This route can be performed by wildlife carers after being taught this technique by a veterinarian and involves injection directly into tissue (not veins). Both Hartman’s® (compound sodium lactate) and 0.9% saline are fluids that can be given subcutaneously.
Apply bandaging
Bandaging injured wildlife is an important skill that needs to be carefully applied. It can make animals more comfortable but can also cause unnecessary pain and reduced animal welfare or complications to the animal’s initial injuries if performed incorrectly.
It is important that carers feel confident that they can bandage an animal appropriately before attempting to do so. Bandages that are placed too tightly can block the blood supply to appendages. Bandages that are placed too loosely will fall off and thus not achieve their purpose.
Table 11 Basic first aid kit for wildlife, items and purpose
| Item | Purpose |
| 500ml or 1L saline solution or Hartman’s fluid bags | Flush wounds of debris. Flush eyes. Applied as part of a wet-to-dry dressing. |
| Gauze squares | Used to clean wounds or applied on bleeding area as part of a pressure bandage. |
| Cotton tips | Small and large. Used to clean small wounds. |
| Self-adhesive bandage | (E.g. Vetrap®, Coplus®, Rip Rap®). Used for pressure, immobilisation and dressing bandages in all animal groups. |
| Crepe bandages | Use limited to larger animals. Non-adhesive and so tape will be needed to hold in place. |
| Micropore® tape | Used to bandage bird legs, hold dressings in place. |
| Non-adhesive dressings | (E.g. Melolin®) Used to cover wounds and absorb discharge. Does not stick to wound. |
| 1% Iodine or Chlorhexidine solution | Antiseptic solution used to flush wounds. Effective against bacteria, fungi and yeast on most animal species. |
| Surgical scissors | Cutting bandages, dressings or fishing line. May be used to trim fur or dead pieces of skin. |
| Tweezers | Handling sterile items, removing ticks/splinters/foreign objects. |
| 20ml syringes with 18G needle | Used to flush wounds of debris and bacteria. |
| Thermometer | Used to take the temperature of the animal. |
Further information
The Victorian Wildlife Rehabilitation Guidelines provide species-specific information for the most common Victorian species that come into care. It provides information about how to capture, handle, assess, care for and release sick, injured or orphaned native wildlife.
If you are unsure of the appropriate first aid treatment for an animal, further advice must be sought from a registered veterinary practitioner or a person experienced in the rehabilitation of the species.
DEECA also recommends that, where possible, wildlife rehabilitators should attend training courses to further develop their skills in wildlife rehabilitation, including first aid. Wildlife rehabilitators can apply for funding from DEECA to undertake training courses through the Wildlife Rehabilitator Grants Program.
More information on the grants program and eligibility criteria(opens in a new window) can be found on the DEECA website.
Enclosure size
To assist in meeting the requirements of Condition 14, please refer to the following information as a basic guide when determining appropriate enclosure size. To calculate the floor area of a:
Rectangle or square
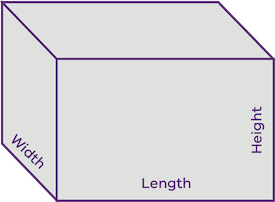
Length x width = area
For example, you acquired or received a rosella that was 30cm long and you planned to keep it in an indoor enclosure which needs to have a minimum floor area of 5000cm2 with a minimum height of 90cm.
Question
You have measured your rectangular/square enclosure and determined that it has a 100cm length, 55cm width and 100cm height. Could you keep the rosella in this enclosure? To determine the floor area = 100 x 55 = 5500cm2 Height = 100cm
Answer
Yes, you can keep the rosella in this indoor enclosure as 5500cm2 is greater than the minimum floor area requirement and 100cm height is 10cm greater than the height requirement.
Triangle
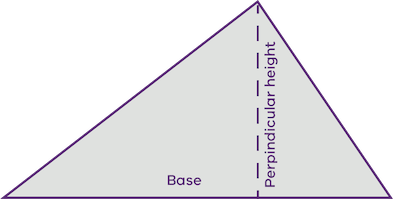
Base x perpendicular height)/2 = area
For example, you acquired or received a Brushtail Possum which needs to be kept in an enclosure that has a minimum floor area of 10,000cm2 and a minimum height of 200cm.
Question
You have measured your triangular enclosure which has a 170cm base length, 105cm perpendicular height and 210cm height. Could you keep the Brushtail Possum in this enclosure? To determine the floor area = 170 x 105 = 17,850 17,850 / 2 = 8925cm2 Height = 210cm
Answer
No, unfortunately the floor area of your enclosure is too small to keep the Brushtail Possum in even though the height is greater than the minimum requirement.
Circle
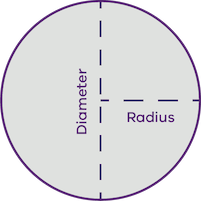
(Radiusπ) x π = area π = 3.142
For example, you acquired or received a tortoise that was 15cm long and needs to be kept in an enclosure that has a minimum floor area of 20,000cm2 and a minimum height of 20cm.
Question
Your circular enclosure has a diameter of 180cm and a 23cm height. Could you keep the tortoise in this enclosure? To determine the radius from the diameter = 180 / 2 = 90 To determine the floor area = 902 = 90 x 90 = 8100 8100 x 3.142 = 25,450.2cm2 Height = 23cm
Answer
Yes, the tortoise can be kept in this enclosure as the floor area is greater than 20,000cm2 and the height is 3cm greater than the minimum height requirements. Keep in mind that as a tortoise is a reptile, there may also be heating requirements for this animal’s enclosure.
Further resources
| Capture and first aid | Capture Myopathy(opens in a new window) | Dr Anne Fowler Free |
| Recognition of Pain in Wildlife(opens in a new window) | ||
| Treating Burnt Wildlife(opens in a new window) | ||
| Housing and husbandry | Australian Mammals (opens in a new window) Biology and Captive Management(opens in a new window) | Stephen Jackson, CSIRO Publishing |
| First aid to release | Victorian Wildlife Rehabilitation Guidelines(opens in a new window) | DEECA |
Updated